Best Bookcase Anchors: Safe & Secure Options for Every Home
Learn which bookcase anchor works best, why anchoring is essential, and how to keep your bookshelf securely fastened to the wall for safety and peace of mind.
Ever wonder why a heavy bookshelf can tip over with just a little push? That scary wobble isn’t just a nuisance – it can be a serious hazard, especially with kids or pets running around. An anti‑tip kit is a simple, low‑cost solution that anchors furniture to the wall, stopping it from flipping. In this guide we’ll explain what an anti‑tip kit does, when you need one, and how to install it yourself in just a few minutes.
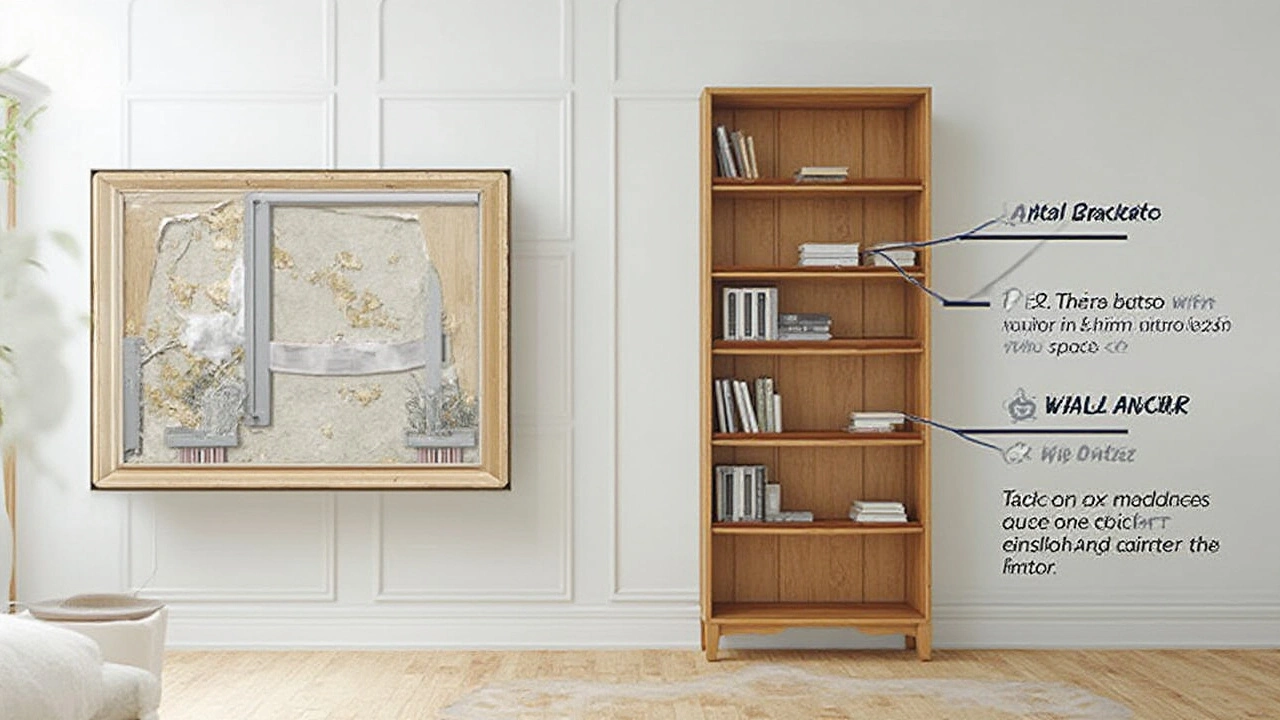
Furniture tip‑overs are one of the leading causes of injuries in the home. A tall bookcase, a TV stand, or a dresser can become a projectile if it’s not secured. The risk spikes in households with toddlers who love to climb, or in rooms that see a lot of movement. An anti‑tip kit uses brackets and sturdy hardware to bolt the piece directly to a stud in the wall, creating a solid connection that prevents it from rotating forward.
Most kits are designed for standard furniture dimensions, but the basic principle is the same: keep the top heavy item from pulling away from the wall. Even appliances like a washing machine can benefit from a kit if they sit on a freestanding frame. The peace of mind you get after installing one is worth the few minutes of work.Another plus is that many insurance companies view secured furniture as a safety improvement, which can lower your risk profile. So you’re not just protecting your family, you’re also making a smart financial move.
Here’s a quick rundown of what you’ll need and how to do it:
1. Gather tools. Most kits come with the brackets, screws, and wall anchors, but you’ll also need a drill, a stud finder, a screwdriver, and a level.
2. Locate the stud. Use the stud finder to locate a solid wood stud behind the wall where the furniture will sit. Mark the spot with a pencil.
3. Position the bracket. Hold the bracket against the back of the furniture, aligning the holes with the marked stud location. Use the level to make sure it’s straight.
4. Drill pilot holes. If the bracket comes with pre‑drilled holes, you can skip this. Otherwise, drill small pilot holes through the bracket into the stud.
5. Attach the bracket. Screw the bracket into the stud tightly, but don’t overtighten – you want a firm hold without cracking the wall.
6. Secure the furniture. Most kits have a second piece that attaches to the furniture itself. Align it with the wall‑mounted bracket and tighten the screws.
Once everything is snug, give the furniture a gentle push to test the stability. If it feels solid, you’re done. If there’s any movement, double‑check the screws and make sure the bracket sits flush against the wall.
That’s it – a few minutes and you’ve turned a potential danger into a safe piece of furniture. The same process works for multiple items in a room, so you can secure a whole set of shelves or a large entertainment center with the same kit.
Remember to repeat the check every few months, especially if you move the furniture or add new items around it. A loose bracket can lose its grip over time, and a quick re‑tighten will keep your home safe.
Installing an anti‑tip kit is one of the easiest ways to make your living space safer for everyone. It doesn’t require a professional, it doesn’t break the bank, and it offers immediate protection. If you haven’t added one yet, grab a kit from your local hardware store and get to work – your family will thank you.
Learn which bookcase anchor works best, why anchoring is essential, and how to keep your bookshelf securely fastened to the wall for safety and peace of mind.