DIY TV Stand Material Selector
Find the perfect material for your custom entertainment center
Recommended Material: -
Select your preferences to get a recommendation.
Fill out the criteria on the left to see the best material recommendation for your project!
Most of us have been there: you buy a stunning new screen, get it home, and realize you have nowhere to put it except on a shaky card table or a pile of old textbooks. Buying a pre-made unit is easy, but those mass-produced boxes often feel soul-less and rarely fit the exact dimensions of your living room. The truth is, you don't need a huge budget or a professional workshop to build something that looks high-end. Whether you have a pile of scrap lumber in the garage or a few old crates in the attic, you can build a sturdy, stylish base that actually fits your space.
Key Takeaways for Your Project
- Wood is the gold standard for stability and versatility, from raw pine to reclaimed oak.
- Industrial metal and piping create a modern, heavy-duty look that is surprisingly easy to assemble.
- Repurposed items like dressers or pallets are the fastest route to a unique, eco-friendly stand.
- Weight capacity is the most critical factor; always ensure your material can support the specific weight of your TV and electronics.
The Timeless Choice: Working with Wood
When people ask what they can use, Wood is the first answer for a reason. It's forgiving, widely available, and takes paint or stain beautifully. If you're starting from scratch, Pine is a great entry-level wood because it's soft and cheap. However, if you want something that won't scratch the moment you move a remote, look for Oak or Walnut.
One of the best ways to get a professional look without the pro price tag is using Plywood. Specifically, Baltic Birch plywood offers incredible structural strength because of its many layers. You can build a clean, minimalist "floating" box or a chunky mid-century modern console. The trick is to edge-band the raw sides of the plywood so it looks like a solid slab of timber rather than a sheet of pressed wood.
For those who love a more rustic vibe, Reclaimed Wood is the way to go. Think old barn beams or salvaged flooring. These materials have a natural character and history that you can't buy at a big-box store. Just a word of caution: always sand reclaimed wood thoroughly and treat it for pests before bringing it into your living room. There is nothing worse than discovering a termite colony inside your new entertainment center six months later.
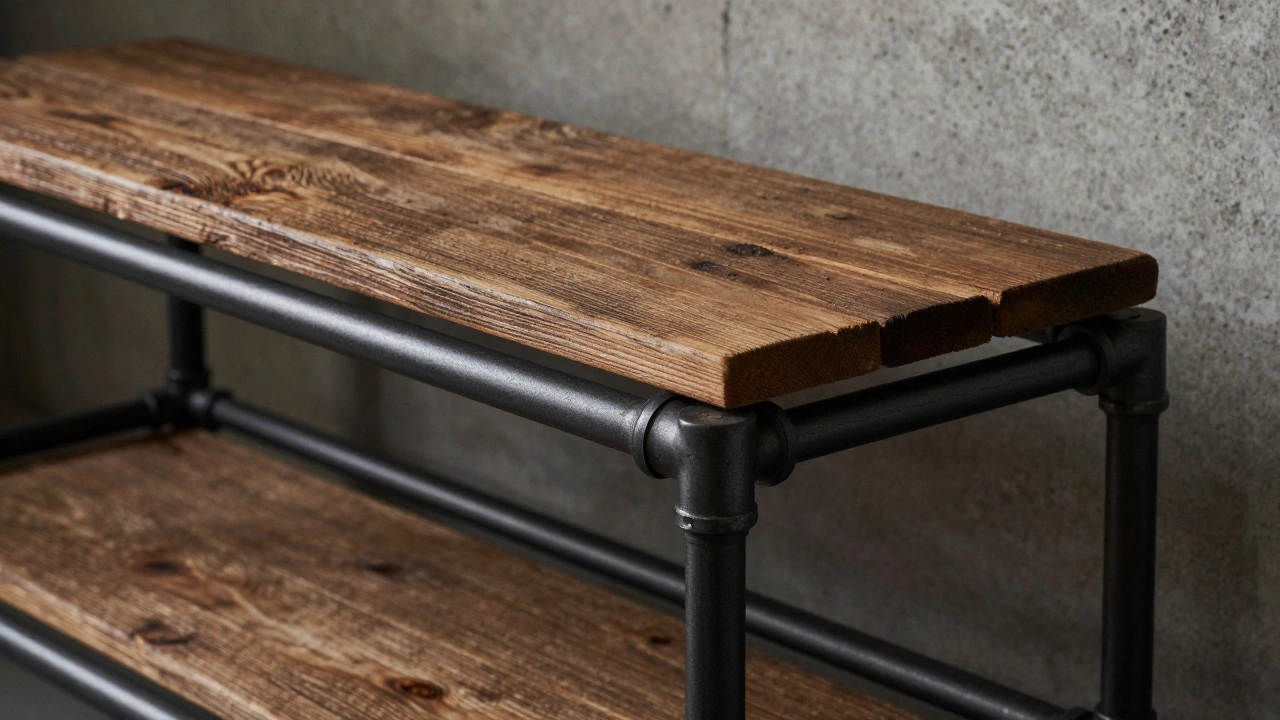
Industrial Vibes with Metal and Pipe
If you aren't a fan of the "cabin in the woods" look, mixing materials is where the magic happens. Galvanized Steel Pipes have become a staple for DIYers because they require zero welding. You simply screw the pipes together using threaded fittings to create a skeleton, then lay wooden planks across the top. This creates a heavy-duty frame that can easily support a 75-inch screen without bowing.
Metal is also great for those who want an open-concept look. Using Square Steel Tubing allows you to create thin, sharp lines that make a room feel larger. If you don't have a welder, you can buy pre-drilled brackets that allow you to bolt the metal frame directly to wooden surfaces. This "hybrid" approach gives you the strength of industrial materials with the warmth of natural wood.
| Material | Skill Level | Durability | Cost | Best For... |
|---|---|---|---|---|
| Pine Wood | Beginner | Medium | Low | Quick projects, painted looks |
| Baltic Birch Plywood | Intermediate | High | Medium | Modern, clean-lined furniture |
| Steel Piping | Beginner | Very High | Medium | Industrial or loft styles |
| Reclaimed Timber | Intermediate | High | Variable | Rustic, farmhouse aesthetics |
| Repurposed Dresser | Beginner | High | Low | Maximum storage and speed |
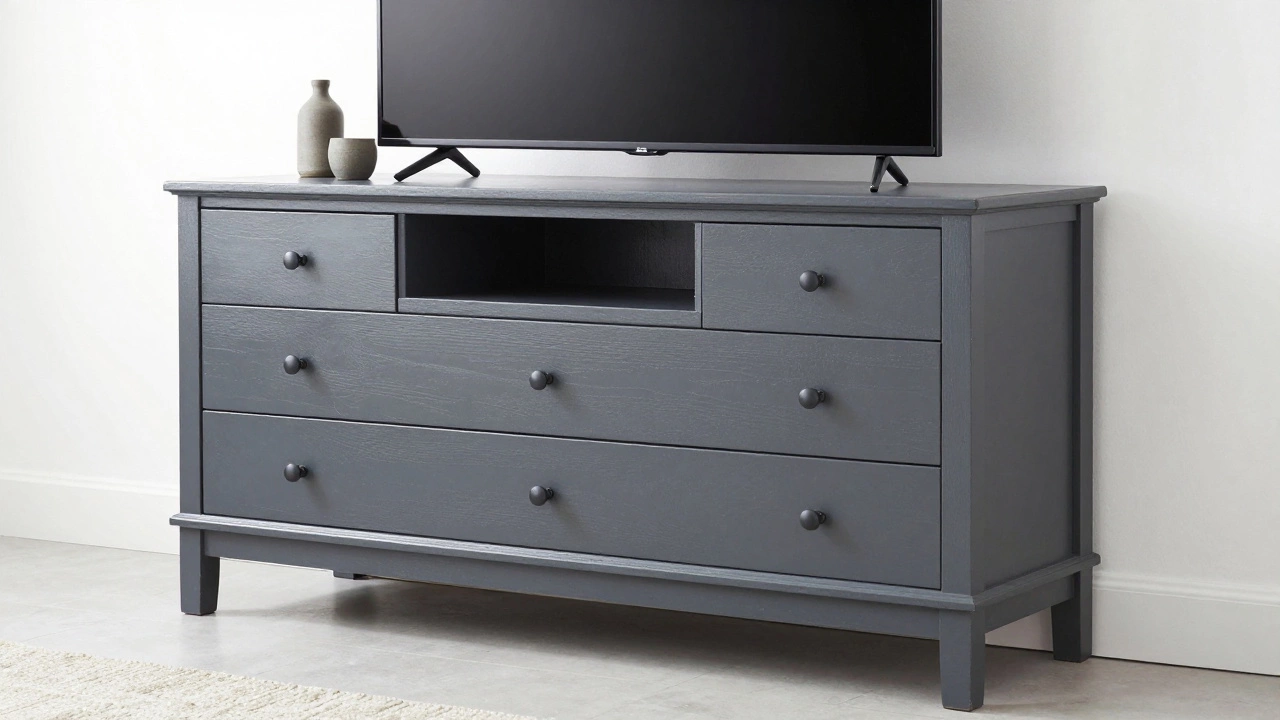
Repurposing Furniture You Already Have
The most sustainable way to make a TV stand is to look at what you already own. A Dresser is essentially a pre-made TV stand with extra storage. If you have an old bedroom chest that's gathering dust, a fresh coat of paint and new hardware (like matte black handles) can transform it into a focal point for your living room. Just make sure the top is wide enough so the TV doesn't overhang the edges, which looks awkward and is a safety risk.
Then there are Wooden Pallets. While they are common in DIY circles, they can look a bit "college dorm" if you aren't careful. To make pallets look professional, don't just stack them. Break them down into individual slats and rebuild them into a structured console. This allows you to create dedicated shelves for your gaming consoles and cable boxes, rather than just having a chunky block of wood.
Another clever hack is using Cinder Blocks combined with thick wooden planks. This is a modular system that allows you to change the height of your TV as you move to different homes. It's an incredibly stable option and works perfectly in a modern, brutalist interior. To keep it from looking too raw, you can paint the cinder blocks a deep charcoal or wrap them in contact paper for a marble effect.
Critical Design Considerations
Before you start cutting or screwing, you need to think about the "invisible' factors. The first is Cable Management. Nothing ruins a beautiful DIY stand like a nest of black wires hanging off the back. If you're building with wood, use a hole saw to drill 2-inch openings in the back panel. If you're using a pipe frame, you can use zip ties or leather straps to tuck the cables along the metal beams.
Next is the Viewing Angle. Your TV should be at eye level when you're sitting on your sofa. If you make the stand too high, you'll end up with a neck ache after a two-hour movie. A general rule of thumb is to keep the center of the screen about 42 inches from the floor, though this varies depending on your seating height.
Don't forget about Ventilation. Electronics like receivers, PlayStation 5s, or Xbox Series X consoles generate a lot of heat. If you build a closed cabinet, your hardware might overheat and shut down. Ensure there is at least a 2-inch gap at the back of the shelves or install a small USB-powered cooling fan to keep the air moving. A tight, sealed box is a death sentence for a high-end gaming PC or console.
Avoiding Common DIY Pitfalls
One of the biggest mistakes beginners make is neglecting the center support. If you build a long stand (over 50 inches) using a single piece of plywood or a thin board, it will eventually sag under the weight of the TV. This is called "deflection." To prevent this, add a vertical support beam or a "rib" in the center of the span. This ensures your TV stays level and your furniture doesn't warp over time.
Another common error is choosing the wrong fasteners. Using short nails in a heavy-duty stand is a recipe for disaster. Always use Wood Screws, which have a coarser thread and grip the wood much more tightly. For metal-to-wood connections, use washers to prevent the screw heads from sinking too deep into the timber, which can cause the wood to crack.
Lastly, be mindful of the finish. If you're using a stain, always test it on a scrap piece of the same wood first. Different species of wood react differently; for example, pine can sometimes turn a strange orange color with certain stains. Using a Polyurethane topcoat is a smart move to protect the surface from water rings and scratches, especially if you plan to place drinks or remotes on the stand.
How do I know if a material can hold my TV's weight?
Check your TV's manual for the total weight. For most DIY builds, a 3/4-inch thick piece of plywood or solid hardwood can easily support a standard 65-inch TV. If you're using something lighter, like thinner MDF or repurposed crates, add a center support leg to distribute the load across the floor rather than relying solely on the side joints.
Can I use MDF for a TV stand?
Yes, Medium Density Fiberboard (MDF) is great for a smooth, painted finish because it has no grain. However, it is much heavier than plywood and lacks the same structural strength over long spans. If you use MDF, keep the span short or add plenty of support beams to prevent the center from sagging.
What is the best way to hide wires in a DIY stand?
The best method is to create a "false back." Instead of pushing the stand flush against the wall, leave a 1-inch gap and use a thin piece of plywood to cover the back, leaving a few strategic openings for cables. You can also use plastic cable conduits or adhesive cable clips along the legs to keep wires out of sight.
How do I stop a DIY stand from wobbling?
Wobble usually happens because the piece lacks "lateral stability." Adding a back panel is the most effective way to stop a stand from swaying side-to-side. If you want an open back, add a diagonal cross-brace (like an 'X' shape) using thin metal straps or wooden slats to lock the frame in place.
Which paint is best for a TV stand?
An enamel-based or semi-gloss paint is usually best because it's more durable and easier to wipe clean than flat paint. If you're painting raw wood, always use a primer first. This prevents the wood from soaking up all the paint and ensures the final color is vibrant and even.
Next Steps for Your Build
If you're feeling overwhelmed, start with a mood board. Gather images of the styles you like-whether it's the clean lines of Scandinavian design or the rugged look of an industrial loft. Once you have a visual goal, list the materials you already have on hand. Often, a combination of a repurposed dresser and some steel piping can give you the exact look you want without a trip to the hardware store.
For those who are brand new to tools, start by focusing on assembly rather than fabrication. Buying pre-cut wood from a home improvement store can save you from the frustration of crooked cuts. As you get more comfortable, you can invest in a basic power drill and a sander to refine your craft. The goal isn't perfection; it's creating a piece of furniture that serves your home and reflects your personal style.