How to Install a Stand on Your Smart TV - Step‑by‑Step Guide
Learn how to safely install a stand on your smart TV with step‑by‑step instructions, tool lists, common mistakes, and maintenance tips for a clean, stable setup.
Putting a TV stand together can feel like a mini‑project, but it doesn’t have to be a headache. Whether you’re adding a sleek console for a wall‑mounted screen or building a sturdy base for a freestanding TV, the basics stay the same: measure, level, and secure. In the next few minutes you’ll walk away with a clear plan, a neat finish, and confidence that your TV will stay put.
First off, grab a tape measure and write down the width of your TV. Most manufacturers list the screen size in inches, but the actual panel width is a few inches less. Add a couple of inches on each side for breathing room – this keeps the TV from looking squeezed and gives space for cables.
If you’re going for a wall‑mounted setup, check the VESA pattern on the back of the TV. That’s the grid of holes you’ll screw into. Match it with a wall‑mount bracket that supports the TV’s weight. For a freestanding stand, look for a piece with a weight capacity at least 20% higher than your TV. A little extra safety margin never hurts.
Next, think about height. The sweet spot is usually eye level when you’re seated. Measure from the floor to the height of your couch’s seat cushion, then aim for the TV’s center to sit about 30‑40 cm higher. Adjust the stand’s legs or use risers if you need to fine‑tune the height.
Now that you know the size, it’s time to set the stand. Start with a clean, level surface. Use a small spirit level to double‑check – a wobble will show up on your screen and can stress the mount.
If you’re mounting to drywall, find the studs with a stud finder and drill pilot holes into them. Then attach the bracket with heavy‑duty screws. For concrete walls, use masonry anchors and a hammer drill. Don’t skip the anchors; they’re what keep the mount from pulling out.
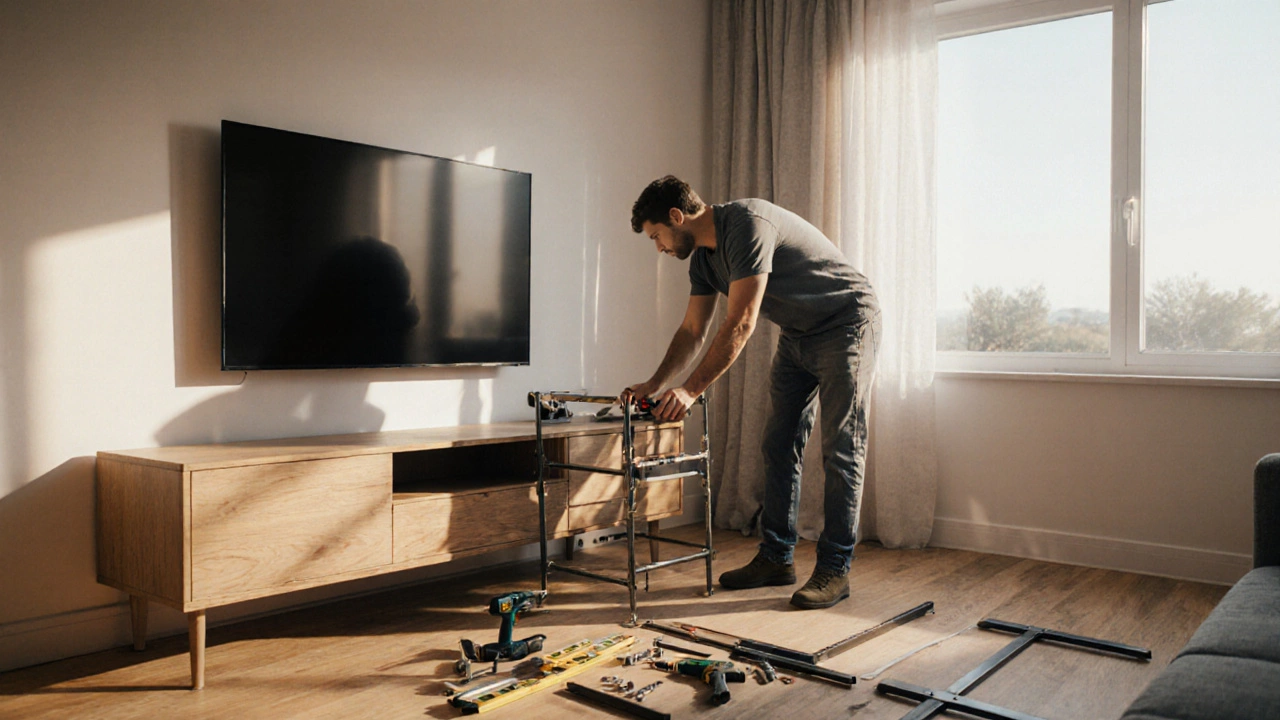
When assembling a freestanding stand, follow the manufacturer’s instructions step by step. Tighten all bolts evenly and use a wrench if the screws feel loose. Once the frame is solid, lay the TV on top and secure it with the supplied straps or brackets.
Cable management is the final polish. Hide power cords and HDMI cables behind the stand or run them through a built‑in channel. If your stand doesn’t have a channel, a simple cable raceway keeps everything tidy and reduces tripping hazards.
Give everything a quick shake to test stability. If there’s any wobble, tighten the bolts again or add a non‑slip pad under the legs. A stable base means you won’t have to worry about accidental bumps.
And that’s it – you’ve installed a TV stand that looks clean, works well, and stays safe. Grab a drink, sit back, and enjoy your favorite shows without a second thought about the furniture holding them up.
Learn how to safely install a stand on your smart TV with step‑by‑step instructions, tool lists, common mistakes, and maintenance tips for a clean, stable setup.